The General Guide to 3D Printing [2021]
YOUR GUIDE TO PERFECT 3D PRINTED PARTS IN 30 TIPS
![Standard Print Co. General Printing Guide [2020]](https://images.squarespace-cdn.com/content/v1/5731cadf7c65e4d72b3b98d1/1604960362849-TUTJSB7MUTLG1UVOHS11/Standard+Print+Co.+General+Printing+Guide+%5B2020%5D)
Your beginners guide to 3D printing in 30 tips. Covering best practices and tips for perfect, stress free 3D prints - no matter what material you’re printing in.
Download our free General 3D Printing Guide, packed with printing tips, settings suggestions as well as a Pre-Print Checklist for perfect prints.
Contains tips that advanced users may find useful too!
We’ve all experienced moments of frustration when our 3D printer simply refuses to print the most straightforward of models. Over the years at Standard Print Co., we’ve helped our customers solve thousands of 3D printing problems from the most challenging to the most trivial. We’ve collected our learnings and condensed them into 30 of our most impactful 3D printing tips guaranteed to help you get the best out of your 3D printer. Master these 30 points and you’ll be pulling off perfect 3D prints in no time.
General Printing Tips
Printer Preparation

1. Level the Bed
How to level 3D printer bed
The first layer of every 3D print is always the most important as it forms the foundation upon which all subsequent layers are built upon. An uneven bed can prevent your first layer from sticking, causing the print to lift or curl - and in some cases even damaging the printer. To prevent this, ensure your 3D printer bed is level before printing.
The Fix
For most standard FDM 3D printers, this can be done by first bringing your nozzle and bed up to printing temperature and manually adjusting the height of the bed. It’s important to level your printer while it is at printing temperature as metal parts on your printer expand slightly when hot.
Set your printer’s Z height to 0mm using your printer’s control panel and sliding 0.02mm metal feeler gauge or a piece of paper under the nozzle.
Adjust the height of your bed using the manual knobs under your bed so that the gauge or piece of paper just barely slides back and forth with the minimum of drag from the nozzle.
Repeat this for all four corners of your bed and the center.
If you can’t get the center level with the corners your bed may be slightly warped and may need to be replaced if your printer does not possess an automatic-mesh-bed-leveling function.

2. Clean Your Bed’s Surface
How to clean 3D printer bed
Loose debris, dust, old filament, un-removed support material and even oil from your hands (resulting from directly touching the bed) are just some of the things that will coat the surface of your print bed over time. These contaminants pose a problem if allowed to build up on your bed, preventing your first later from properly adhering. To prevent this and ensure the longevity of your build surface clean your bed’s surface regularly.
The Fix
To clean your 3D printer’s bed, wipe down the bed between every print with unscented alcohol wipes or using unscented isopropyl alcohol and a clean rag. If you are printing on a new PEI build surface and are experiencing adhesion issues, a light even sand with 600+ grit sandpaper will greatly increase print adhesion.

3. Clean Outside Of Nozzle
How do I clean my 3D printer’s nozzle?
Over time excess plastic can start to build up on the hotend. This stray buildup of plastic can lead to a drop in print quality - even causing prints to fail. Keeping your nozzle clean and clear of debris can prevent this from happening.
The Fix
To clean your 3D printer’s nozzle:
Set your nozzle temperature to 260C+ (or the highest temperature you can set your extruder temperature to).
Check hotend for any stuck on filament that may have worked its way onto the hotend during previous prints, pulling larger debris off with tweezers.
Clean your extruder with a brass wire brush by giving your nozzle a light brush with a brass wire brush while hot can also help in removing tough to remove carbon buildups.
You may consider fitting your printer with a silicone extruder cover/sock to help you keep your extruder assembly clean.

4. Clean Bowden Tube
How do I clean my printer’s bowden tube?
Small amounts of debris in your boden tube have a high chance of causing a partial or full clog in your printer’s nozzle. Partial clogs can result in low quality 3D prints and full clogs prevent the printer from printing entirely.
The Fix
Clean your bowden tube by:
Unloading any filament still loaded in the printer by bringing it up to the material’s printing temperature and pulling the filament out.
Decoupe both ends of the bowden tube from the printer.
Give the bowden tube a quick blast of air to dislodge any debris inside the tube.
Reconnect the bowden tube to your printer, making sure to push it all the way back into its coupler.
After insertion into the coupler, your bowden tube should fit snugly and should not slip from the coupler when pulled. If you do notice some play, your coupler may be worn and need replacing.
It is important to note that while the small amount of debris harbouring in your bowden tube may seem inconsequential, it only takes a tiny amount of dust to clog a 0.4mm nozzle. If you suspect that your filament may be dusty refer to tip 11. You may also consider printing an in-line, filament dust cleaner to keep your filament dust free.
5. Clean the Inside of your Nozzle
How do I unclog my 3D printer’s nozzle?
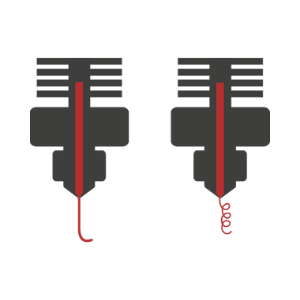
Over time, dirt and debris can build up inside your 3D printer’s nozzle resulting in a clog. In the event that your nozzle is completely clogged, you’ll notice that filament fails to exit even when the nozzle is brought up to printing temperature - no matter how hard you push.
Partial clogs are less obvious to spot than complete clogs. They can be identified by bringing your printer’s nozzle to heat and manually pushing filament through the nozzle - all the while paying special attention to the path the filament takes immediately after exiting the nozzle. If the filament 1) exits in a stuttering stream, 2) curls sideways after exiting the nozzle or 3) requires more force than usual to be pushed out then you may have a partial clog. In either case, clearing both types of clogs involves using a technique called a Cold Pull in order to dislodge any obstructions.
The Fix
To do a cold pull on your 3D printer:
Heat the hotend to your printer’s maximum temperature. and insert the cleaning filament by hand into the hot hotend. The filament should begin to leak out the end nozzle in the event of a partial clog. In the event of a full cog, no filament will ooze out. In this case, a set of nozzle cleaning drill bits or acupuncture needles can be inserted back through the exit of the nozzle back into the hotend body to break up the obstruction. Obstruction clear, filament should begin to leak out the nozzle.
Once filament can be seen leaking out the nozzle, set the hotend temperature to 0°C maintaining pressure on the filament while the hotend cools.
When the hotend has cooled below 50°C the filament in the hotend would have solidified, trapping all contaminants in a solid mass. Set the hotend temperature back up to the maximum temperature. Gently pull on the filament as the hotend heats up.
Note: Maintain light pressure on the filament but don’t apply excessive force tugging on the filament as this could damage the extruder.At 160°C+ the filament will begin to soften.The objective is to pull the filament out at the lowest possible temperature possible, ensuring that the filament stays as solid as possible, pulling any potential contaminants in the nozzle out.
Repeat steps 1-5 x 3 times to ensure all potential contaminants are removed. For more information refer to our Standard Print Co. cold pull guide here.

6. Clean Extruder Gears
How do I clean my 3D printer's extruder gears?
Over the course of your printer’s life, dust and ground-up filament powder may build up on the teeth of the extruder gears. If left unchecked, the debris will affect your printer’s ability to grip the filament causing filament slippage and extrusion problems.
The Fix
If you begin to notice problems with extrusion, unload any filament and give your extruder gears a light scrub with a brass wire brush to dislodge any caked on dirt or dust before giving the area a quick blast of air to clear the debris. If you are noticing large amounts of filament dust being generated after every print, the tension in your extruder gears may be too high. Refer to your printer’s manual on how to decrease the tension of your printer’s extruder gears.
First Major Service
Most 3D printers from reputable manufacturers will complete a small test print before being shipped but these aren’t long enough to “break in” your 3D printer. Breaking in of your 3D printer usually occurs over the course of your first 5-10 prints of your 3D printer and is when the belts will undergo some slight stretching, and screws can loosen. These include the grub screws connecting gears and other screws connecting plastic parts on your 3D printer.
After your printer has completed its first few prints, give the screws that hold plastic parts in place and grub screws in the belt pulleys and the hobbed gear a quick tighten with two fingers using hex keys supplied with your printer, being careful not to overtighten.
Belts will complete most of their stretching over your first few prints and may slacken. While the optimal amount of slack present in a printer’s belt will vary from printer to printer, a good starting point is to pluck your belts like a guitar string listening for the sound of the lowest E on a bass guitar. Should you need to tighten your printer’s belts, consider 3D printing a simple belt tensioner.

7. Tighten Belts & Gears
How do I tighten my 3D printer's belts and gears?
Over time, your printer’s gears and belts may loosen and require some attention; this may cause a gradual decrease in print quality. Problems resulting from loose belts and gears include ringing and layer skipping.
The Fix
Consider 3D printing and fitting a simple belt tensioner to your printer if your belts feel loose. Refer to the tip: First Major Service for more details. The grub screws in the pulley gears of your printer may also loosen over time requiring tightening. Give the screws a quick tighten with two fingers using hex keys supplied with your printer, being careful not to overtighten. Signs of loose pulley gear screws are tricky to spot and can result in a host of printing problems - keep your screws tight.

8. Check your bearings (and lubricate them)
How do I check my 3D printer's bearings and lubricate them?
Functioning correctly, your printer’s bearings should 1) guide whatever they are connected to without wobbling and 2) do so smoothly, without excessive or uneven drag. To check if they are operating correctly, first turn off and unplug your printer. Then, slowly and gently push your extruder and bed along their respective axis, checking for wobbling and any spots of unusual drag. If you find that you are experiencing some drag or resistance with your bearings, or are conducting routine maintenance, you may consider greasing them.
The Fix
Preventative greasing will extend the lifespan of your bearings and save you from replacing them. Heavier weight lithium based greases are recommended for linear bearings (although you will have to take them off their carriage to get inside them. If you are looking for a more convenient method that does not require disassembly, sewing machine oil will do the trick and often has low enough viscosity to seep through the bearing’s seals and lubricate the inside. Post lubricating, if you find that the bearings still drag or the action is not smooth, you may consider replacing the bearings.
A small amount of play is usually acceptable when it comes to your extruder but should you be experiencing more than 5° of rotational play from your extruder, you may consider adjusting the bearing mounts (if they are roller bearings mounted on eccentric nuts). For most of our 3D printers, the bearings that hold the extruder carriage can be tightened by using a hex key and rotating the single eccentric nut holding the bearing on the top. If you notice that you are at tightest setting for this nut, it may be time to replace your bearing.
THE ENVIRONMENT

9. No Draughts
Why are my 3D prints warping?
As plastic cools, it contracts. This occurs more rapidly and to greater effect when it is cooled down quickly. It’s important that your 3D printer is placed in an environment that is kept at a relatively constant temperature and free of draughts. Droughts and cold breezes can cause uneven warping on your parts as they print. While some materials like ABS are more susceptible to this and can cause parts to pop off the bed or even collide with the nozzle, causing print failure.
The Fix
To prevent this, keep your 3D printer in a sheltered environment. Corridors, thoroughfares, large open spaces and rooms with high foot traffic are not ideal places to set up your 3D printer.

10. Maintain Proper Ventilation
How do I maintain proper ventilation in my 3D printer's room?
Good ventilation is also key to your health as the operator irrespective of the material you are printing.
The Fix
If proper ventilation cannot be maintained without causing draughts and breezes, consider working in another room while the printer is active. If you must be present in the room when the printer is in operation, you may consider using an air purifier such as a Zimpure to keep VOC’s within acceptable levels.

11. Keep It Clean
Why do I need to keep my 3D print area clean?
It’s important to keep the area surrounding your printer clean and tiny. As mentioned in tip 2 and tip 5, dusty printing environments can be a determining factor in the success of your 3D prints. Dust surrounding your printer invariably ends up either on the printer's bed itself affecting part adhesion or in the nozzle, causing clogs.
The Fix
Keep the levels of dust and airborne particulates low by vacuuming the surrounding area regularly. You may find having a bin closeby to to the printer for support material and offcuts helpful.
File & Slicer Settings

12. Print With Correct Temperatures
What temperature should I 3D print at?
The large majority of 3D printing problems encountered when printing can be solved by printing with the correct nozzle temperature for your material. Printing too hot and you may start to see stinging, oozing, more unintended artifacts appear on your prints and sloppy layer lines. Symptoms of printing too cold can include filament slipping, incomplete prints and extruder gears grinding or stripping filament.
The Fix
All reputable 3D printing material producers will provide a range of suggested printing temperatures for their filaments. When considering what temperature to print the material at, start with the lowest temperature recommended by the manufacturer - only increasing temperature if extrusion problems become evident.
13. Use the Correct Bed Temperatures
What do if my 3D parts are not sticking to the bed?
While filaments like PLA can be printed on an unheated bed, for best results we recommend always printing with a heated bed at the suggested bed temperature listed for each material.
The Fix
If adhesion becomes an issue, try printing the first two layers of a print 5°C hotter than the suggested bed temp of the material to aid in adhesion. Avoid maintaining this build temperature for the whole duration of the print or higher as this can result in print quality issues such as elephants foot.

14. Print With A Brim or Raft
What how do I stop my 3D print warping?
All 3D printed parts shrink as they cool - with materials ABS having a higher potential to shrink than others like PLA or PETG.
The Fix
Printing with a brim or raft can increase the model’s footprint. This can be especially helpful for being printed in materials that have a high potential to shrink or those with a small footprint on the bed. Doing so can prevent the part warping, curling and will keep the model stuck to the bed for the duration of the print.
Printing with a brim tells the printer to print a single flat layer around the base of your model. The brim is connected to the base of your model and can be easily post processed by running a knife along the base of your model.
A raft tells your printer to print a thick layer between the print bed and your prin. Rafts are great for models that don’t have a completely flat base and are usually easier to remove than a brim, being able to be simply peeled off without tools. The ticker raft increases print time and material usage.

15. Watertight models
What is a non-manifold edge and how do I fix it?
If you’ve designed your model in a CAD or sculpting program, it’s important to ensure the model is watertight and does not contain any non-manifold edges. These are impossible geometric intersections where the volume calculations of a model cannot be computed, resulting in a model that is unprintable.
The Fix
Fortunately the fix is simple. Tools3D is a free online tool hosted by Microsoft that is designed to deal with this very problem. Simply login, upload your file to the site, let it repair the model before downloading your model for printing.

16. Minimum Layer Time
Why are my 3D prints not smooth?
In general, increasing printing speeds results in a decrease in part resolution. This is especially true for smaller parts as each layer may not have had enough time to adequately cool before the next layer is added.
The Fix
When printing smaller parts, manually setting a minimum layer time to a value greater than 15 seconds per layer will ensure each layer is solid before another layer is printed on top - preventing sloppy layers from forming.

17. When in doubt, print slow
What speed should I 3D flexible filaments print at?
When printing in flexible materials, it’s especially important to print at slower speeds to allow the layers to adequately cool before printing the next layer.
The Fix
When printing in flexible materials, aim to print at speeds of 20-25mm/s for best results.

18. Check Layer View
How will I know if my 3D print is going to fail?
When slicing your print in your slicer, it’s important to conduct a final check over your print job to check for any unsupported overhangs or other areas of the print that may cause issues during printing.
The Fix
This can be done by selecting the Preview Pane in Cura and then sliding the slider up and down Layer View to view each layer of your print. Pay special attention to any parts that simply appear without support material underneath. Consider generating manual support blocks in your slicer if you happen to encounter any problem areas.
Filament Care

19. Snap Test
How do check if 3D printer filament is wet?
Filaments are hygroscopic. This means that it absorbs moisture from the surrounding air if left unsealed. When wet, materials such as PLA become brittle and snap easily. For materials such as ABS and PETG, bubbles may form as the molten filament leaves the nozzle resulting in poor surface resolution for your prints.
The Fix
To check if your PLA is in optimal printable condition, take a piece of the filament and bend it back on itself. If it bends without snapping, it’s good to print. If the filament snaps, then it is most likely wet. For materials such as ABS and PETG, bring your hotend up to printing temperature and insert your filament. Wet filament will result in fizzing and popping sounds from the moisture in the filament turning into steam.
20. Unload & store your filament
How do I store 3D printer filament?
UV light, moisture and warm temperatures will degrade your filament over time.
The Fix
When not using your filament, make sure to unload it from your printer, and store in an airtight container like a zip lock bag or sealed plastic tub with ample amounts of desiccant to prevent your filament from absorbing moisture. If possible, keep this container in a dark place free from light. This will keep your filament in tip-top printing position.

21. Dry your filament
How do I dry 3D printer filament?
Wet or old filament can be rescued by being dried out. The easiest way of doing this is by storing it in an airtight container with ample amounts of desiccant.
The Fix
The Dry Box Method:
(Optional) Weigh your spool of filament, recording its weight.
Place your filament in an airtight container. Fill the container with enough desiccant to maintain a constant humidity level of 10-15% after you place your filament in. When choosing desiccant for your dry box, aim for non-colour changing silica (some colour changing varieties can produce harmful chemicals when baked or “regenerated” in a hot oven) for a reusable option or single-use, dissolving desiccants like Damp-Rid are a great choice.
Check daily to ensure the humidity level inside the dry box keeps inside (or preferably below) the 10-15% humidity range.
Leave filament in the “dry box” for a minimum of 2-3 days.
(Optional) Check to see if your filament is in printable condition. For PLA, a simple snap test may be sufficient. Weighing filament to determine the amount of moisture lost is also an effective method of ascertaining the filament’s “dryness”. Most “standard” 3D printing materials such as PETG, ABS and PLA can lose up to 0.3% of their initial weight in moisture using this method. Extremely hygroscopic materials such as Nylon can lose close to 2.5% of its weight in water.
Be sure to store dried filament back in your “dry box” when not in use.
The Oven Method:
(Optional) Weigh your spool of filament, recording its weight.
Preheat your oven to 10°c under your filament’s glass transition temperature. Consult your filament’s associated Technical Data Sheets (TDS) for specific glass transition temperatures.
Bake your filament overnight (6-8 hours) at 10°c under its glass transition temperature.
(Optional) Check to see if your filament is in printable condition.
Store dried filament back in your “dry box” when not in use.

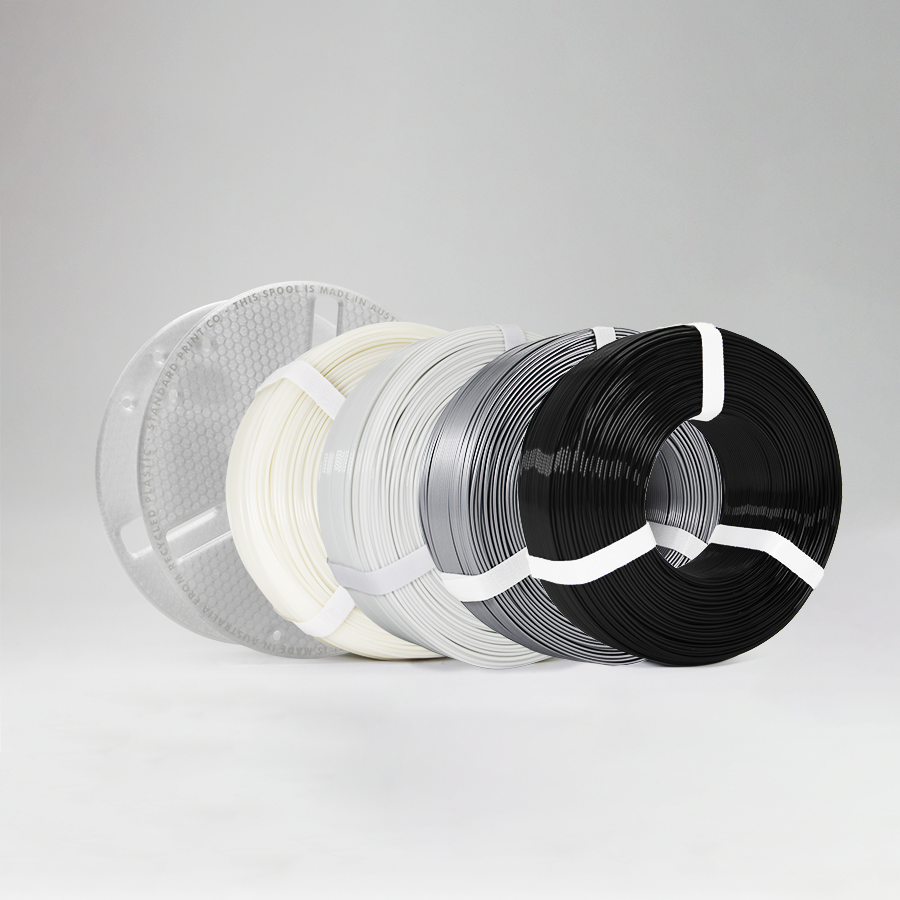
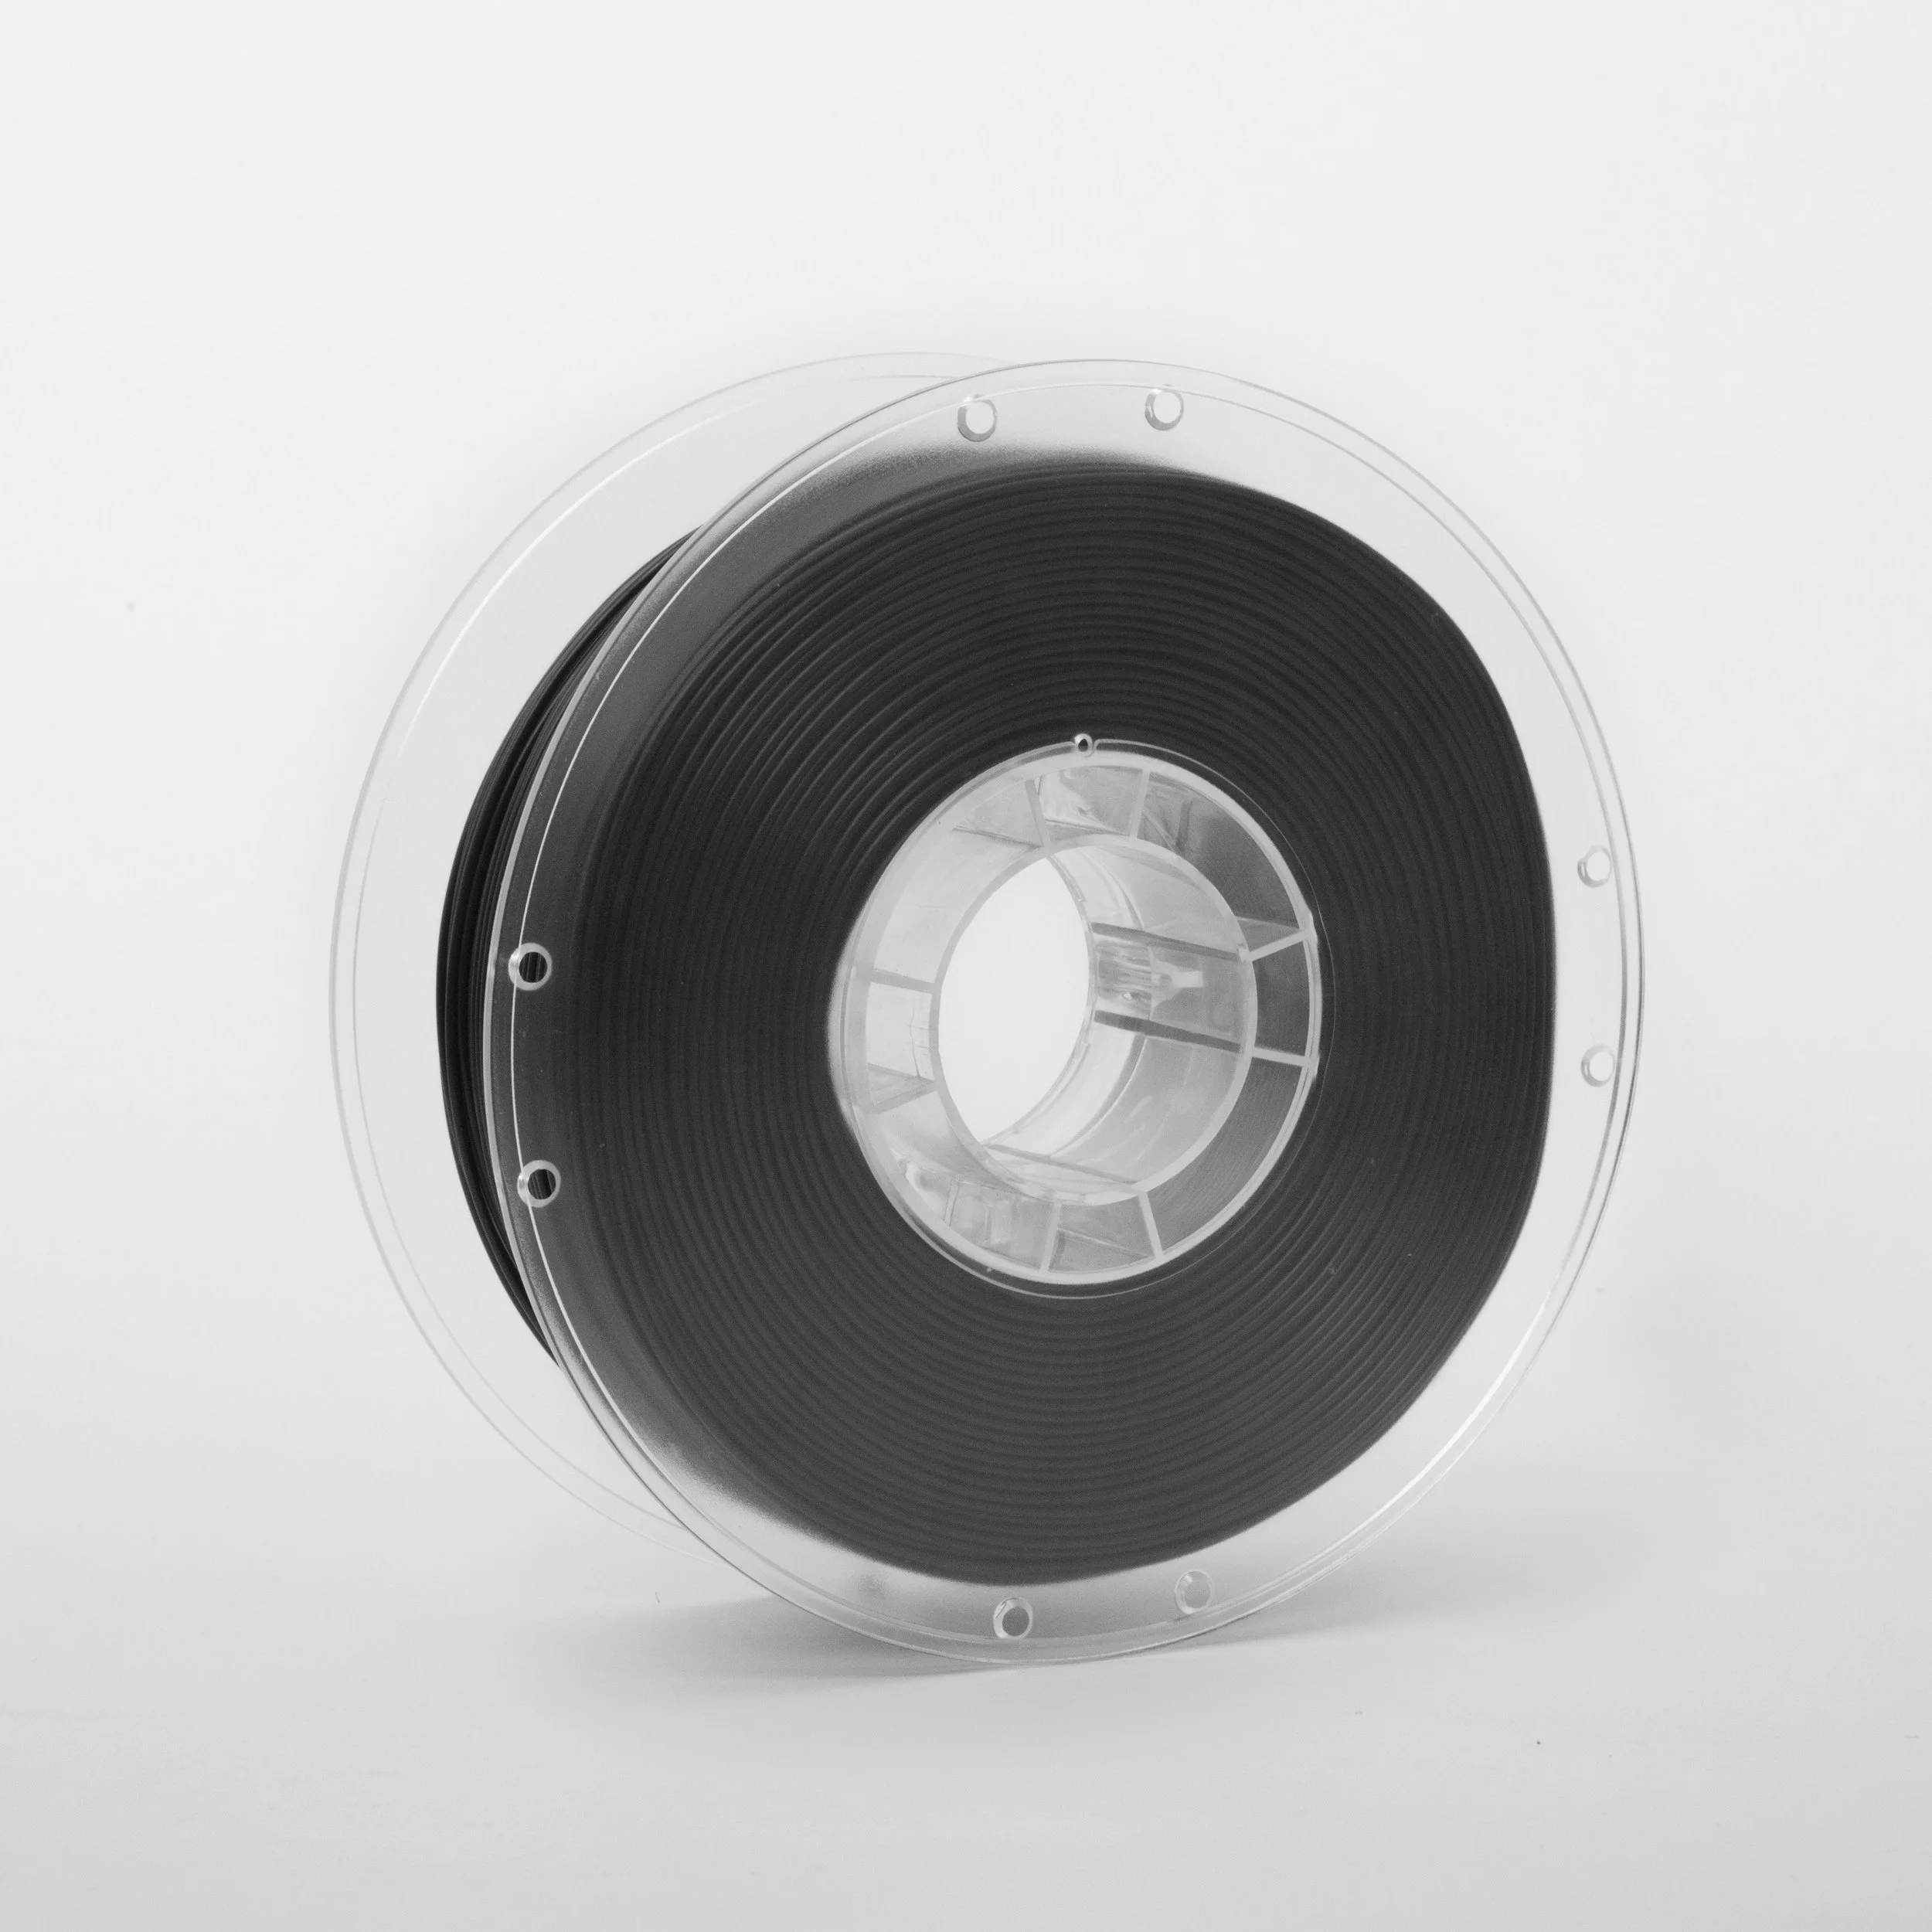
22. Use Quality Filament
How to choose 3D printer filament
Using high quality filament is more important than you might realise. Poor quality filament can lead to increased print failure, leading to wasted time and material.
The Fix
Standard Print Co. filament is made using only pure feedstocks and high quality pigments. Our filament is phthalate free and made to ROHS standards resulting in a safer filament for both you and marine environments. For this and more on our responsible practices check out our ECO+ initiative.
23. Keep It Tight
How to stop 3D printer filament kinking?
Whenever you are loading or unloading your filament, keep the filament taut and free of slack. When storing your filament, use the eyelets provided on each spool to maintain tension. Respooling uncoiled filaments in an orderly manner is difficult and if done incorrectly can lead to kinks or knots developing in the line, leading to print failure or printer damage.
The Fix
If you are experiencing troubles with your filament unwinding off the roll during printing, try increasing the distance between the spool and your printer. This increase in slack between the two will smooth out the jerking/pulling motion of the printer on the spool and help maintain a more constant tension on the filament - keeping it on the spool.
24. Trim filament to 45° angle
How do I load my 3D printer with filament?
After printing, the tip of the filament that is closest to your 3D printer may be melted into a shape that makes it difficult to reload into the printer.
The Fix
Before loading your filament into your printer, use a pair of side cutters and trim your filament at a 45° angle to ensure the end of the filament comes to a point. This helps the filament find its way through the bowden tube to the extruder, ensuring that it doesn’t get snagged on something somewhere along the way.
25. Push before pulling
How to change filament in 3D printer
The throat of your printer’s extruder is often wider than the inner diameter of the bowden tube. After printing, the molten plastic that is located in the throat solidifies, forming a solid mass of plastic that is often too wide to fit back through the bowden tube. If this mass is not melted before unloading your filament, you may 1) have trouble removing the filament altogether or 2) damage the inside of the bowden tube, scraping the inside and creating small particles of PTFE. (the material the tubes are often made of) PTFE is designed to resist the high temperatures of your extruder and can gather inside your nozzle, forming an unmeltable partial or full clog.
The Fix
When manually removing or changing filament that is loaded in your 3D printer, bring your nozzle to printing temperature and push your filament in 2-3cm (extruding a small amount) before pulling the filament out. This will make removing the filament far easier and prevent damaging the bowden tube and the extruder gears. If you suspect your printer’s nozzle may be clogged, refer to tip 4.

26. Printing Composites
Can my 3D printer print filled filaments?
Composite materials like wood, glow-in-the-dark or carbon filled filaments are abrasive. Over time they will wear down the inside of your printer’s nozzles and extruder gears.
The Fix
When printing in these materials, you may consider upgrading your printer’s standard brass nozzles with nozzles made from ware-resistant materials such as stainless steel or tungsten carbide. Choosing a nozzle with a larger diameter (0.6mm+) can also help as it decreases the likelihood of clogs developing and blocking the nozzle.
27. Printing flexible materials
Can my 3D printer print flexible filaments?
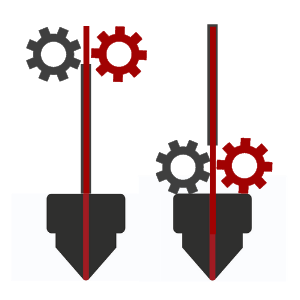
Your printer’s ability to print flexible materials will be determined by the design of it’s extruder - whether it’s bowden or direct drive. For printers with a direct drive design, the extruder gears that feed the filament are situated directly behind the hotend. Thanks to the relatively small distance between the gears and the nozzle, direct drive printers can print very soft filaments (<95A shore hardness) with ease. For printers with a bowden design, the extruder gears and nozzle are separated by a longer length of PTFE tubing. This increased distance between the two means that bowden printers have a harder time printing softer material (<95A shore hardness) as the material may kink and bend over the length of the tubing, causing extrusion problems.
The Fix
Yes if your printer has a direct drive feeding system and can heat up to the recommended printing temperature. If your printer is of a Bowden design, try sticking to flexible filaments of shore harnesses greater or equal to 95A. See tip 17.
During Printing

28. Don’t Leave It Hot
Can I leave my 3D printer on?
While keeping your printer at printing temperature for long periods of time in between prints can be tempting to keep your printer at printing temperature so it’s ready to print the moment you are, this can lead to a whole host of problems for you later.
1) Your filament may begin to thermally decompose when held at long periods of time at printing temperature leading to solid clogs to form in the nozzle.
2) The filament can dribble out of the nozzle leading to incomplete first layers. The material that dribbles out can be picked up layer by your printer (leading to dirty nozzles) and dragged across your 3D print, causing a decrease in print resolution or even print failure.
3) Heat creep can occur when the heat from the heat block radiates upwards and travels back up the printer’s extruder to the thermal barrier tube (or bowden tube). The material in this thermal barrier tube swells as it melts and when cools, forming a clog that is impossible to remove without cutting the affected length of tube off.
The Fix
No. Don’t keep your nozzle at printing temperature for long periods of time in between prints. Instead, allow the printer to come up to temperature using its own startup sequence.

29. First Layer
My first layer won’t stick. Should I keep printing?
The first layers of your 3D prints are the most important as they form the foundations of your 3D print and are indicative of the success of your print. If there is an issue with the first few layers (adhesion, over-extrusion or artifacts) the print is most likely going to fail.
The Fix
When printing, make sure the first layers of your print are sticking well and are not lifting or curling. If you do spy an issue, it's best to cancel the print and resolve the issue before continuing as failed prints not only waste precious filament but can also damage your printer through collisions.

30. Removing Prints
How to remove stuck on 3D print?
When removing parts from your printer, try to use as little force as possible - excessive force may cause your print bed’s state of levelness to change or even damage the printer.
The Fix
Here are some tips for removing your prints:
Upgrade to a flexible print bed - Flexible print beds like Ziflex, are a great first upgrade for a 3D printer, they make removing a print as easy as peeling it off the bed and don’t require you to relevel your bed after every part you remove.
Use a spatula or palette knife - Using the right tool for the job is always the best idea. Using your spatula, find the sharpest corner of the base of your print and try to wedge the blade between the part and your print bed. The idea here is to get some purchase under the print (~1cm in) and gently lift the knife to peel the part off the bed.
Use Floss - The coated surface of most dental flosses are great as they lubricate the floss as it removes your part. To remove your part with floss, take a long piece of floss with both of your hands and work it under your completed part, working in a horizontal sawing motion.
Did we miss something?
Have a tip of your own that you’ve found invaluable?
Leave a comment down below and let us know!
Downloads
Find the guide above useful?
Download your very own copy of our General Printing Guide for free now!
![Download Standard Print Co. Genreal Printing Guide [2020]](https://images.squarespace-cdn.com/content/v1/5731cadf7c65e4d72b3b98d1/1600062835338-I69RDUZM81SFOYQ7VTFB/Standard+Print+Co.+Genreal+Printing+Guide+Download.)
Waste less filament on failed prints.
Spend less time tinkering with your printer in search of the “perfect settings”
Gain the confidence to print for longer
Expert advice with simple explanations for both beginners and advanced users.
Your very own pre-printing checklist
Information on service and maintenance intervals for your 3D printer.